Practical Five
| Deliverable | Due Date |
|---|---|
| Practical 5 | March 31, 2026 at 11:59 PM |
| Practical 5 (revision) | April 26, 2026 at 11:59 PM |
Goals
- Convert the Vermont Hikes site to accept user data
- Learn about forms and RRv7 actions
- Add persistence to the Vermont Hikes site with Supabase
Prerequisites
Create the git repository for your practical by accepting the assignment from GitHub Classroom. This will create a new repository for you with the Next/React infrastructure in place.
Clone the repository to you computer with
git clone(get the name of the repository from GitHub).Open up the
package.jsonfile and add your name as the author of the package and add the url of your repository.Install the module dependencies by typing
pnpm installin the shell in the terminal in the root directory of your package (the directory that contains the package.json file).Get some practice with our new workflow and start by making a feature branch in your repository.
Make sure that you have completed the Getting Started steps and have Docker Desktop installed.
At this point you are probably just blindly cloning your repo, running pnpm install and moving on. I’ve not been calling you on not adding your name.
This time, however, it is important that you follow all of the steps. In particular, I need you to enter in the url of your GitHUb repository in the indicated spot in package.json. The tests are going to be run through GitHub actions, and Gradescope needs to know where to find the results.
Background
In the version of Vermont Hikes that we looked at earlier, all of the data was static and loaded in from a JSON file.
While this works, it is atypical. It can cause long initial load times and worse, it means the user only works with a version of the data that only lives in their browser, so changes don’t persist.
We are going to do two things today. First, we will add reviews to the hikes, and second we will introduce Supabase as a way to persist all of the data.
Adding reviews
As you look around the site, you will see that each hike as an empty list of reviews. The only exception is Snake Mountain which has one pre-loaded review so you can see what it looks like.
Make the input form
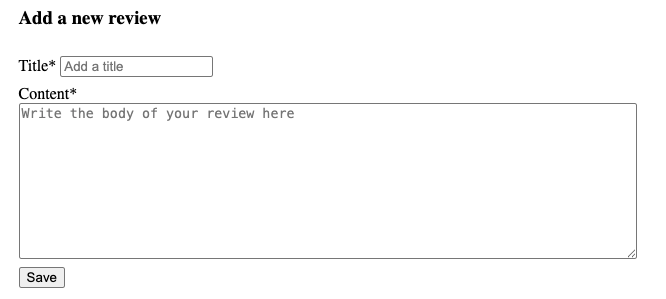
Our first task will be to add the ability to write new reviews. In app/components you will find a new component called ReviewForm. Add it to the route in app/routes/hike.tsx under the second <hr />. At the moment, it just returns its name. What it should look like is this:
When we want to collect data on a web page, we will frequently make use of a form. While we can just place user input elements on a page and manage it all ourselves, forms are useful because they can be associated with an action that will be performed when the user clicks a submit button, and all of the data will be sent to the action at once.
React Router v7 comes with a Form component that includes soe extra capabilities, such as revalidating the page when a form action completes.
The RRv7 documentation says that we should only use the Form component if the action is going to change the URL (i.e., change the browser history), and we should use the fetcher.From. We are going to stick with Form because for the homework assignment you will be affecting the browser history.
Inside the the <div> create a new <Form> element. Set the method to “post” (method="post"). Start by adding in an <h3> for the “Add a review” text.
The next step is to add the text input that will take the title of the review. This is what I would like you to use:
<label>
  Title*
  <input
    type="text"
    aria-label="Title"
    name="title"
    placeholder="Add a title"
    required
  />
</label>
There are a couple of things going on in here. First, I have wrapped it all on a <label> tag. The label associates the text (“Title”) with the input element. This makes it easier for screen readers to associate the name with the element on the page. In particular, this is an implicit label, where it is figuring out that the ”Title” is the label for the text input. The explicit form would put the label just around the “Title*” and use a for attribute to point it to the text input.
We have set the type of the input element to “text” to make this a text input box.
We are using the aria label again to support screen readers and to give us access for our tests.
The placeholder attribute allows us to put in the greyed out text that goes away when we start typing (as distinct from a default, which would be a preloaded value).
Finally, we mark this as required. This is another advantage to using a form. It won’t let the user submit until they have filled out the required fields of the form.
Do something similar to create the Content input. The different is that this will not use an <input> tag. Instead, it will use a <textarea />. The <textarea/> element is used for inputting multi-line text data. Set the rows attribute to 10 and the aria-label to "Content".
Finally add one more <input> at the bottom with type "submit" and value "Save". This will provide us with our submit button.
Make sure it is showing up properly in the dev server. If you click the button, however, you will can error that the method is not allowed. That is because the page is posting, but there is nothing to catch it.
Add an action
Form actions can be configured to do a lot of different things, from running a piece of JavaScript to sending the contents of the form back to the server. In RRv7, the <Form> element provides us with some extra control (which is why it raised an error). In particular, just as we could add a loader to our routes to get data for our components before they are rendered, we can add an action function.
Just as we saw for the loader, there are two different action functions we can define depending on where we want the data to be handled: clientAction and serverAction. We will stick to the clientAction this time.
Start by adding a new clientAction function to hike.tsx.
export async function clientAction({ params, request }: Route.ActionArgs) {

}The most pragmatic answer is that these special functions only work on routes. However, we could also note the advantage of having the action be at the route instead of the component level. For the route, there will be one particular action that makes sense given the context of the rest of the page. For a component, however, we might reuse it and want to have a different action in different contexts (e.g., we could make some changes to ReviewForm so it took in an existing review and use it to handle both updates and creation).
Note that there are two parameters passed in as Route.ActionArgs. The first is params, which you previously encountered in the loader. This is the same parameter we saw earlier and will give us access to the route variables. We can omit this if we don’t need these.
The second is a Request object. When we fetch data with JavaScript, the Request object is created to bundle together information about the request. This is not a special RRv7 object, this is a built in type that RRv7 has intercepted and handed over to our action method for dissection.
What we are most interested in is the request’s formData() method, which returns a Promise that will resolve into the form data. We want to extract this:
const formData = await request.formData();We aren’t done yet, however, because the returned value is an object of type [FormData] (essentially a special purpose dictionary). We want to extract our named fields from formData.
const { title, content } = Object.fromEntries(formData);For the final step, we want to call the addReview function.
await addReview(params.hike, title as string, content as string);This grabs the unique hike id from the URL and then sends the new data back to our data interface.
Test this out by adding some reviews. You should see that the page loads up with the new review without us having to do anything this. This is the effect of RRv7 revalidating the route when the action completes.
Unfortunately, as soon as you reload the page, all of the reviews are reset. So, we need to add some persistence.
Setting up Supabase
We are going to put down the hikes for a moment and spend some time setting up Supabase.
Installation
- Open up Docker Desktop. (we are going to install a local instance in a Docker container)
- Install the supabase command line tool (consult Getting started)
- Add the client library with
pnpm add @supabase/supabase-js - Run
supabase initto initialize the system. This will create a supabase directory in your project root. You will be asked if you want to setup settings for Deno for different environments. You can reply “n”. - Start the supabase server with
supabase start
This will take a little bit of time as the tool pulls down all of the resources for the supabase container (which includes a number of sub-containers).
When it is complete, you will see something that looks like this (I’ve replaced the various keys):
╭──────────────────────────────────────╮
│ 🔧 Development Tools                 │
├─────────┬────────────────────────────┤
│ Studio  │ http://127.0.0.1:54323     │
│ Mailpit │ http://127.0.0.1:54324     │
│ MCP     │ http://127.0.0.1:54321/mcp │
╰─────────┴────────────────────────────╯

╭──────────────────────────────────────────────────────╮
│ 🌐 APIs                                              │
├────────────────┬─────────────────────────────────────┤
│ Project URL    │ http://127.0.0.1:54321              │
│ REST           │ http://127.0.0.1:54321/rest/v1      │
│ GraphQL        │ http://127.0.0.1:54321/graphql/v1   │
│ Edge Functions │ http://127.0.0.1:54321/functions/v1 │
╰────────────────┴─────────────────────────────────────╯

╭───────────────────────────────────────────────────────────────╮
│ ⛁ Database                                                    │
├─────┬─────────────────────────────────────────────────────────┤
│ URL │ postgresql://postgres:postgres@127.0.0.1:54322/postgres │
╰─────┴─────────────────────────────────────────────────────────╯

╭──────────────────────────────────────────────────────────────╮
│ 🔑 Authentication Keys                                       │
├─────────────┬────────────────────────────────────────────────┤
│ Publishable │ sb_publishable_AAAAAAAAAAAAAAAAAAAAAAAAAAAAAAA │
│ Secret      │ sb_secret_BBBBBBBBBBBBBBBBBBBBBBBBBBBBBBB      │
╰─────────────┴────────────────────────────────────────────────╯
These are the values we care about:
- API Project URL: this is the address your project will connect to
- Studio URL: this URL provides a dashboard interface for interacting with your local supabase instance
- Publishable key: this key can be used by your client to gain access to supabase
- Secret key: this key can be used by your server to gain access to supabase
We can use supabase status to repeat this data again later. They are also available in the dashboard.
As described in lecture, we really want to keep the secret key secret. If someone has access to that key, they can do anything to your database. DO NOT commit this to your git repository, even if your repository is private. Once in there, it can be very difficult to purge since your repo hangs on to its history (that is kind of the point, after all). So, even if you delete the reference, you may someday take the repository public for some reason, and someone will poke around in the history and find your key.
Between this practical, the next assignment and the project, you will have a collection of different supabase instances to manage. They will not want to run simultaneously unless you edit the port number in supabase/config.toml. A better plan is to just run one at a time. Pay attention to the error message – it will provide the command to stop the currently running instance.
A good practice to get into is running supabase stop when you are done.
The dashboard
Navigate your browser to the address provided as “Studio URL”. If your mouse over the icons on the left, you will see the collection of functions you can perform with the dashboard. You will find this very useful for viewing and interacting with your data as your project gets more complex.
.env file
We actually have two issues to deal with. Not only would we like to be able to have values that are accessible to our application that are not saved anywhere public (or even potentially public), but we want to be able to switch between development and production mode for our applications without having to go in and edit the code itself.
The solution is environment variables. These are values that we set before we start an application that are available to the running code. These are used by all sorts of systems. On Mac and Linux systems, you can see the current environment variables by typing env on the command line. On Windows, you can try typing set into the shell.
There are a number of ways we can set the environment variables, but in the name of automating all of things, we want something convenient as well. The standard has become the use of .env files (pronounced “dot env”). We write key=value pairs into these files, one per line. Our tooling will then make sure that these environment variables are available to us. We will frequently add suffixes like .env.local or .env.development. We will also add them to our .gitignore files to make sure they are never committed.
Vite supports .env files directly and all variables will be available in the code via import.meta.env.variable, where variable is the environment variable. There is a caveat, however. The variables are only available in the Node environment (i.e., on the server side), which we haven’t even started using. They are not available on the client side, because then our environment would be visible to anyone who happened to load our web app. If we want the variable to be passed along to the client side, we have to name the variable with the prefix VITE_. We can put whatever we like after that, but the VITE_ must be there 1.
If your client side code relies on an environment variable, you will be sending the contents of the variable with the contents of your page to the client. Assume that any variable you name with VITE_ will be read by everyone in the world – do not use it for secrets.
Create a file called .env.local (it is already covered by .gitignore, so it should not get added to your future commits). Add three variables: VITE_SUPABASE_URL, VITE_SUPABASE_ANON_KEY, and SUPABASE_SECRET_KEY, and set them to the API URL, the Publishable Key and the Secret Key respectively. Your file should look like this (obviously with the values from your running Supabase instance):
VITE_SUPABASE_URL=http://127.0.0.1:54321
VITE_SUPABASE_PUB_KEY=sb_publishable_AAAAAAAAAAAAAAAAAAAAAA
SUPABASE_SECRET_KEY=sb_secret_BBBBBBBBBBBBBBBBBBBBBBBBBBB
Note that we are exposing the URL and the publishable key. Both of these are meant to be shared broadly. That said, the assumption is that the database is read only or you have set some additional security in place to prevent abuse. We will gloss over that here and return to it in a later practical.
Setting up the database
Migrations
Now that the database is running, we need to provide a schema that will support our data needs. As we discussed in class, we want to specify the database schema using migrations so we can rapidly provision a database on a clean system and can keep track of changes in our version control. There is a way to perform this process by designing the database graphically with the dashboard and then pulling it down into a migration, but we are going to to this one completely by hand since it is fairly basic.
Create a new migration with
supabase migration new hikesThis will create a new file similar to supabase/migrations/20260317035638_hikes.sql. The first part of the file name is a date stamp which makes it unique as well as allowing us to apply the migrations in order. The file itself is a .sql file, so we are going to fill it wil SQL commands.
For our purposes, we are going to make tables for three entities: Towns, Hikes, and Reviews. I am going to make some small alterations from the structure we have in the JSON. The JSON used a nested structure for the data. We are going to spread it out between three tables and use foreign keys to link them together.
Towns - id (string) - name (string)
Hikes - slug (string) - name (string) - difficulty (string) - description (string) - town id (string)
Reviews - id (number) we need a unique identifier for our reviews - title (string) - content (string) - hike id (string)
The SQl that we need will not be terribly different (other than being in SQL)
create table if not exists towns (
    id text primary key,
    name text NOT NULL
);


create table if not exists hikes (
    slug text primary key,
    name text NOT NULL,
    difficulty text NOT NULL,
    description text NOT NULL,
    town_id text NOT NULL REFERENCES towns(id) ON DELETE CASCADE
);

create table if not exists reviews (
    id bigint primary key generated always as identity,
    title text NOT NULL,
    content text NOT NULL,
    hike_id text NOT NULL REFERENCES hikes(slug) ON DELETE CASCADE
);
This is the simplest translation into the data types available in PostgreSQL – there are many more available.
To apply the migration, run
supabase db resetIf you read the messages, you will see that this is recreating the database from the migration. We don’t currently have anything stored (or configured) in there, but if we did, this would wipe it away and replace it with the pristine scheme we just put in our migration.
If you go look in the dashboard you will find the database now has the three tables.
Generate the database types
Supabase has the capability to generate Typescript types that correspond to our tables and queries so we don’t have to specify too many things by hand.
In the terminal, run
supabase gen types typescript --local > app/data/database.types.tsThis will generate the types for the database and store them in a new file in the app/data directory.
Seed the database
“Seeding” the database means to load it with some initial data. In most instances, this isn’t a step you would do to your production database. The content should come through use of the site. During development, however, it can be convenient to to dump a big set of data into the database at the start to see how the site looks and works as it scales up.
One way we can seed our development database is by creating CSV files and importing them directly into the tables using the dashboard.
A better way would be to to create a seed file that is automatically read in when the database is reset (if you look at the output of running supabase db reset is warning that it can’t find supabase/seed.sql). This is something we can configure in supabase/config.toml. The problem with this approach is that we need to have our data in the form of SQL statements and we have a JSON file that uses nested structures.
There are a lot of ways we could transform our data to get it into the database (e.g., writing a custom script that reads the JSON and directly inserts items using the Supabase API).
I am going to point at this as one of the points where Generative AI is a good choice. Data transformations over a lot of data is something that it can do far easier than we can. Create a new file supabase/seed.sql. Open up Copilot. If you are in seed.sql, it should already list that as context. Use the + symbol to add the JSON file and the migration. This is the prompt that I used:
Read in the data in hikes.json and use the schema in the migration to populate seed.sql
It successfully populated the seed file with INSERT statements that copies in the data from the JSON file.
Run supabase db reset again. Now you should see data in the tables in the dashboard.
You may see that all of the tables have red warning labels that they are “Unrestricted”. If you mouse over them, it will tell you that “This table can be accessed by anyone via the Data API as RLS is disabled”. This is the internal security that I told you about. We are going to ignore that for the time being.
Database interactions
Now that all of the preliminaries are out of the way, we can start writing some application specific code for interacting with the database.
Setting up the Supabase client
Create the file app/lib/supabase_client.ts (you will need to create the lib folder).
Add the following to the new file:
import { createClient } from "@supabase/supabase-js";
import type { Database } from "~/data/database.types";

// Client-side Supabase client (for browser/React components)
export function createSupabaseClient() {
    const SUPABASE_URL = import.meta.env.VITE_SUPABASE_URL;
    const SUPABASE_PUB_KEY = import.meta.env.VITE_SUPABASE_PUB_KEY;

    if (!SUPABASE_URL || !SUPABASE_PUB_KEY) {
        throw new Error(
            "Missing VITE_SUPABASE_URL or VITE_SUPABASE_PUB_KEY environment variables",
        );
    }
    return createClient<Database>(SUPABASE_URL, SUPABASE_PUB_KEY);
}

export const supabase = createSupabaseClient();
The function in this file is just calling Supabase’s createClient function which creates the client we will use to access the database.
There are three other things that I want you to notice in here.
First, you can see how we are accessing the environment variables.
Second, notice that we are exporting a value not the createSupabaseClient function. This is making use of a pattern we haven’t encountered before called the singleton pattern. The idea is that the first time a component requests the client, the function will run. However, after that, any further requests for the client will return the same object without running the function again to create a second client (which works, but causes warnings).
Third, we have imported the types that Supabase generated for us and are applying them to the new client. This will mean that the values returned by our queries will be properly types by Typescript.
Updating the data access functions
Earlier, I introduced you to the idea of creating a collection of data access functions that provided a thin wrapper over our data operations. This is where that is going to come in handy because we can update those functions to get data from our database without actually touching the rest of the code, provided we preserve the interface we established earlier.
Go to app/data/data_utils.ts and add an import to our client at the top:
import {supabase} from "@/lib/supabase_client";Fetching the towns
The first thing we will do is replace the functionality of getTowns. If you look at that function, it is returning an array of objects that have the id and the name of the town. This is a simple selection out of the table:
const {error, data} = await supabase.from("towns").select("*");This just reads everything out of the "towns" table.
If there is a problem, error will have a value and data will be null. So, we want to make sure we check if there is an error:
if (error){
    throw new Error(error.message);
}
That will bail us out if there are any issues, and then we can just return data which is the array we wanted.
You can reload the page and it… shouldn’t look any different (that’s a good thing).
Fetching the town data
The getTownData function is a little trickier. This returns all of the data associated with the town. looking at the JSON, that means it expects the id, the name, and hikes, which is an array of all of the hikes in that town.
We can actually get all of this with a single Supabase query:
const { error, data } = await supabase
        .from("towns")
        .select("id, name, hikes(*)")
        .eq("id", town)
        .single();
There is a lot going on here, so let’s look at it all in turn.
from("towns"): This part we are familiar with. It says we are using the towns table.
select("id, name, hikes(*)"): I have specified the id and the name columns. I could have used the *, but this is more explicit. The real interesting part of this is the hikes(*). This is performing a join for us. This works because the hikes table has a foreign key that references the towns table. For each row of the towns table, it will fetch all matching rows from hikes and return it in an array with the row’s other data. We can specify specific columns from the hikes table, but I chose to just grab them all2.
eq("id", town): We don’t want the data for all of the towns, this function just gets the data for a single town. So this is a filter that only returns rows that match the rule that id matches the passed in town id.
single(): This will limit the result to just the first matching row that it encounters, and will return a single object instead of an array.
The returned data should be in the right format for us, so you can copy the error handling and return statement we used in the last function.
Fetching a hike
The return value from this function is an object of the form { hike: hike, town: { id: townId, town: townData.name } }, where the hike is an object with all of the hike fields (slug, name, difficulty, description).
This time we can’t make a query that returns us the data in precisely the form we would like, but we can get all of the data we need with a single query.
const { error, data } = await supabase
        .from("hikes")
        .select("slug, name, difficulty, description, towns(*)")
        .eq("slug", hikeId)
        .eq("town_id", townId)
        .single();
This time we flipped the foreign key around in the other direction, but the principle is the same. note that we didn’t really need to check the town_id because our slug is already a primary key. however, this adds a little extra error checking. If the user tries a URL that puts the hike in the wrong town, this will return nothing instead of ignoring the town.
Add the error checking.
For the return value you will need to deconstruct the data the put it in the right format.
Fetching the reviews
This one is pretty straightforward. We just want all of the reviews where hike_id matches hikeId.
If you are stumped, the query is:
const { error, data } = await supabase
        .from("reviews")
        .select("*")
        .eq("hike_id", hikeId);
Adding a new review
This one is a little different since it involves putting information into Supabase, which uses insert.
const { error } = await supabase
        .from('reviews')
        .insert({ title: title, content: content, hike_id: hikeId });
While different, it is pretty straightforward – we just specify the values for the various fields. Note that we are just getting the error this time. Since the table is set up to automatically add a unique id, we may want to get the fully formed review back, but in this instance we won’t bother. The refresh that RRv7 does for us will handle getting the full record back out for us. You will still want to add the error check however.
Cleaning up
Now that everything is happening through the database, you can delete all of the other cruft in this file you no longer need, like the data import, the reviews constant and the accessLag function. am
Finishing up
Make sure the tests are passing (with pnpm test) and there are no linting errors (with pnpm check). Once you have fixed any test or linting errors, add and commit any changes you may have made and then push your changes to GitHub. You should then submit your repository to Gradescope as described here.
As I said above, for this assignment, the test running will be performed by a GitHub action. Gradescope will just read the results of the run. As such, please do not submit to Gradescope until the Github Action has completed running the tests. This has been taking 4 - 4.5 minutes, though it sometimes takes much longer. If you can’t wait, go ahead and submit, but be prepared that it won’t pass and leave me a note to rerun the autograder later.
Requirements
- Should fetch data from local Supabase instance
- Should add reviews on local Supabase instance
- Pass all tests
- Pass all Biome checks
Recall that the Practical exercises are evaluated as “Satisfactory/Not yet satisfactory”. Your submission will need to implement all of the required functionality (i.e., pass all the tests) to be Satisfactory (2 points).
Footnotes
For the full details, consult the documentation↩︎
For more on joins, read the Supabase docs↩︎