CS 105 - Assignment Seven
Goals
- Gain some more experience manipulating images at a pixel level
- Work with multiple sprites to achieve some interesting effects
Prerequisite
For this assignment, you will need my starter project. Open the link and then save to make your own copy.
Sepiatone
I would like you to make a new block: 
The block should take in the pixels of an image and return a new list of pixels that have been converted to "sepiatone".
Sepia is a very common photo filter — just about every photo editor has some variant of it. This mimics the effect of an old chemical process that left black and white images yellowish in appearance.
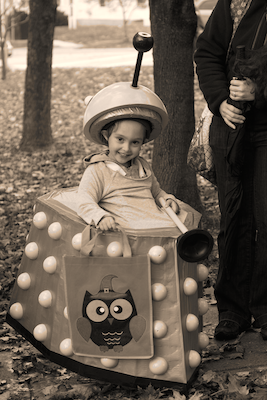
We can do this by creating a grayscale image, and then adjusting the red and blue channels to give it a yellowish tint. If we just add some yellow to everything, however, it doesn't look very good. So we are going to treat the high values, low values and mid values separately.
The process works like this. First calculate the luminance (average brightness) of the pixels as you did to create the  in exercise 13. If we just use this luminance value for all three channels, we will get the grayscale image you already created. Instead, create a new red value by multiplying the luminance by the appropriate factor below. Do the same to create a new blue value. The green channel can take the raw luminance value. So, for example, if we have a luminance of 130, you create a new color with (1301.15, 130, 130.85) = (149,130,110). If you had a luminance of 50, your color would be (55, 50, 45).
| type | range of values | red weight | blue weight |
|---|---|---|---|
| shadow | 0-62 | 1.1 | 0.9 |
| mids | 63-192 | 1.15 | 0.85 |
| highlights | 193-255 | 1.08 | 0.93 |
Start like we did in the exercise, and make a ![]() . Then map this block over the image to produce the new sepia image.
. Then map this block over the image to produce the new sepia image.
Expectations
- Two blocks: and

- The should convert one pixel to sepis using the conversion factors given above
- The should convert an entire image to sepia
Impressionism
For the second part of the assignment, you are going to make an impressionistic painting that looks like you are looking through a frosty window.
This will be a very different process than what we have done with images so far. We are going to combine images with some of the pen drawing that we were doing before.
You will see that there is a Sprite called "Painter". Click on it to edit its scripts.
The painter sprite is going to randomly run around the screen drawing short lines pointing in random directions. The color of the line will be determined by the color of the image at the place where the sprite starts.
The basic algorithm goes like this:
- move to a random position
- set the color of the pen to the color of the image where the sprite is
- put the pen down
- turn by some random amount
- move forward
- pick the pen up
This should all be put in a  so the painter will eventually visit all of the screen.
Details
You need two blocks to make this work.
The first is  , from the Sensing palette. Set the first input to R-G-B-A and the second to 'myself'. This will read the color found directly under the tip of the sprite. Try it out first. Drag the sprite around the stage and then click on the block to see what color is there.
The second is the  . This comes from the 'Colors and Crayons' library. You will need to import this to add it to the Pen palette.
Once you have this script assembled, you may notice that it is running around very busily, but you can't see anything. Return to the first sprite and pull out the  . Use it to set the ghost effect of the sprite to 100 (effectively making it invisible). Curiously, since you only hid the image using the ghost effect, the sensor will still be able to see the color of the image.
Once this is working, play around and set the pen size and line length to values you find pleasing.
Expectations
- There should be a script in the Painter sprite that performs random drawing
- The random drawing should use the color of an image to create an impressionistic version
Exceeding expectations
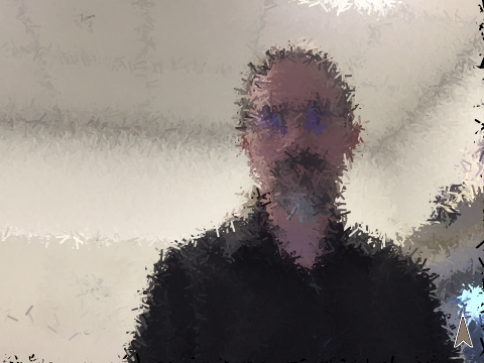
To exceed expectations, you will implement a "ghost viewer". The idea is that you will have an image with noe one visible, but when you drag the "ghost viewer" over the scene, you will see someone lurking there.
Create the images
For this to work, we need two images, one with you (or someone else) in it, and one of exactly the same location without the person.
Create two variables: background and ghost. These will hold the two images.
Write a script that does the following:
- Enable the camera
- Take a picture and stores it in
ghost - Set the current costume to
ghost - Wait 5 seconds (so you can get out of the way)
- Take a picture and stores it in
background - Set the current costume to the background
- Switch off the camera
You should now have two costumes of exactly the same location -- one of which includes a "ghost".
Set up the viewer
You will see that there I left you a third sprite called 'Viewer'. Switch to that sprite.
I have given it a basic circle for a costume, but it is initially hidden. Click  so you can see it.
You want to set it up so that it follows the mouse when you drag it around the stage (this should sound very much like what we did to draw with the sprite).
Use the  to detect when the sprite is 'pressed' (we want to drag the sprite around, so we want the mouse button to still be down). As long as the mouse is still down, use
  to chase the mouse pointer. Make sure that works.
Once that is working, add a  and broadcast the signal 'update'.
At this point, you should be able to drag the circle around, and every time it moves, it broadcasts 'update' (though you won't be able to see that part)
Create the viewer effect
Now you are going to put the finishing touch on that shows the hidden picture through the viewer.
You are going to need a new block we have not used yet:  .
.
This takes the current costume of a sprite and combines it with the shape of something else, which, in effect, masks or crops the image.
Return to the main sprite. Make a new script that fires off when it receives the 'update' message. It should do the following:
- Switch to the
ghostcostume - Paste on to the Viewer sprite
- Switch to the
backgroundcostume
You should now be able to drag the viewer around the stage, revealing the "ghost".
Submitting
It is quite possible that the size of your project will exceed the size that can be stored in the cloud. If that happens, save the file to your computer and upload it to canvas.
If your file is still small enough to share, share the project using the instructions from exercise 1.
Visit the assignment page on Canvas to submit the URL or the file.