CS 312 - Assignment Three
Goals
- Get more practice implementing React components, including incorporating PropTypes
- Advance your understanding of the division of responsibilities and state between components
- Incorporate styling with CSS-in-JS (with Styled Components)
Prerequisites
This assignment builds on the work of assignment 2. As such, you should not start it until you have passed all of the Gradescope tests. While this doesn't assure you that you will have "met expectations", it is enough to proceed.
- Click the GitHub classroom link and then clone the repository GitHub classroom creates to your local computer as you did in previous assignments.
- Update the author information in the
package.jsonfile - Install the package dependencies with
npm install - Copy your components over from assignment 2. In the interest of letting you resubmit assignment 2, the assignment 3 skeleton does not include the work you did in assignment 2, so you need to manually copy it over. Make sure to just copy the .js (and possibly .css) files.
Once you have the dependencies installed you can start the development server with npm run dev.
Make sure that the new copy of your project is working before proceeding.
Practice good Git practices by creating a working branch for your features.
Background
This assignment, the next part of creating Simplepedia, starts where assignment two left off. As with previous assignments an initial set of (failing) tests are provided as part of the skeleton (run with npm test). These tests are intended to help you as you develop your application and to ensure that the grading scripts can successfully test your assignment. Code that passes all of the provided tests is not guaranteed to be correct. However, code that fails one or more these tests does not meet the specification. Testing React applications is a future topic and so you are not expected to write any additional tests for this assignment.
Assignment
Part 1: Add PropTypes and CSS modules
If you have not already done so, please add PropTypes to your existing modules. You will find that I have enabled the PropTypes checker in eslint, so your code will no longer pass the linter without them.
You should also now be using CSS modules. There are only two components that currently need styling: Article and whatever you called your section list. You will find the styles you need in src/styles/globals.css at the end of the file. Make sure to remove them from this file after adding them to your two .css files.
Recall that to use the styles, you will import them into the files holding your components like
import styles from './Article.module.css';
You then apply the css class names to your elements with the property className. For example, you would style the Article component's main div with className={styles.article}.
There are two things to watch out for with the existing styles. Consider this:
.section-list ul {
  list-style: none;
}
The CSS selector (the part before the {} that determines which elements get the style) has two things going on.
First, section-list can't be used directly in JavaScript (i.e., styles.section-list would be interpreted as styles.section - list). You can rename it, or you can use the alternate way to access object properties in JavaScript: styles['section-list'].
Second, the ul there means that this style applies to ul elements that are children of an element with the class section-list.
As you add additional components below, be sure to use PropTypes and CSS modules as needed.
Part 2: Allow the user to add new files
Create a new Editor component in src/components/Editor.js. It should allow the user to create a new article. In this part you should pass a single prop to the Editor component: a "required" callback named complete that takes an article object as its argument and creates or updates that article (the comments discuss a second prop -- this will be added later). Make sure to use these names (and any others specified in the assignment) to facilitate automated testing.
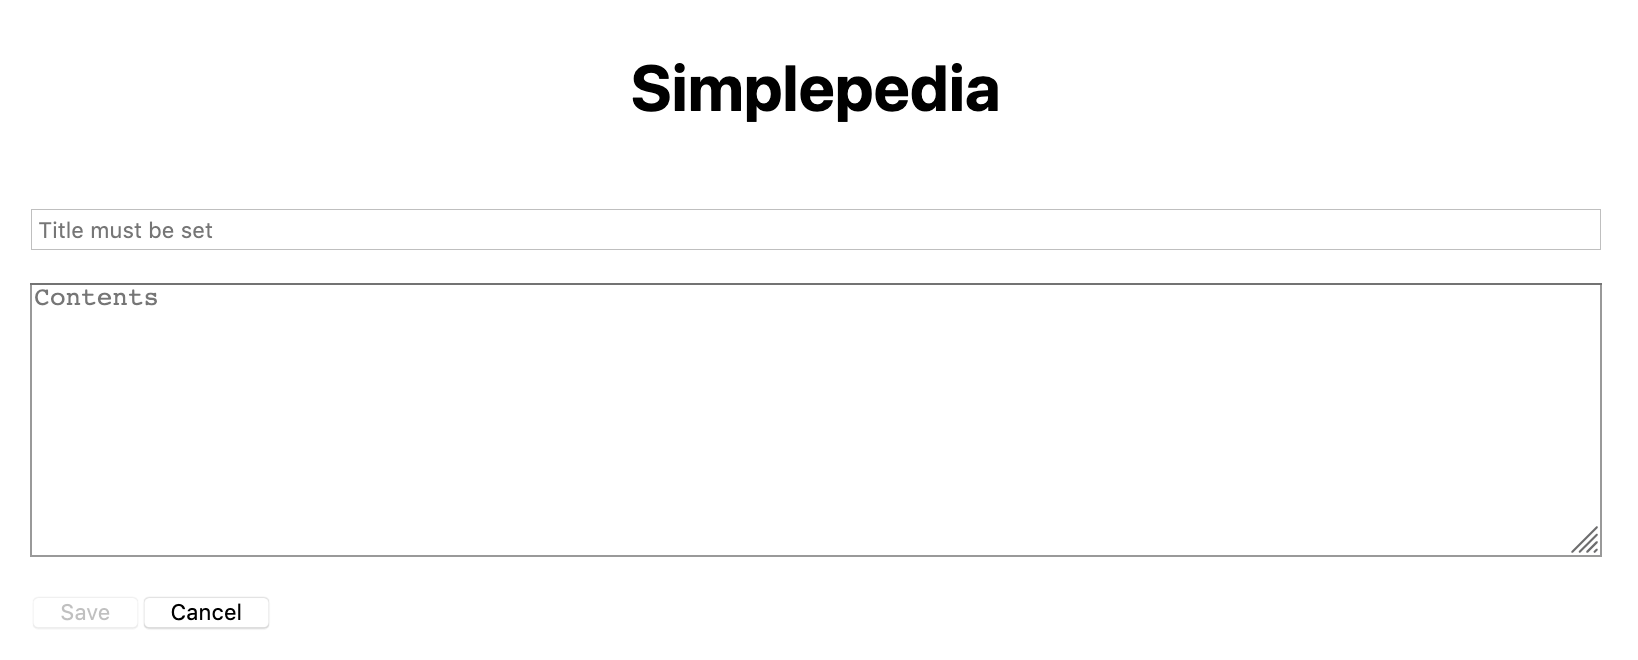
Your component should use an <input> of type "text" to allow the user to enter in a new title and a <textarea> to allow the user to write the body of the article. Your component should have two buttons. The first should be a "Save" button. When the user clicks it, the article should be saved, and editing should be completed (your editor styling does not need to match the example above). The date on the article should be set to the current date and time (as an ISOString via Date.toISOString()), and the article should be added to the collection. The second should be a "Cancel" button. When the user clicks cancel, the edit should be discarded and the primary interface should be restored. Keep in mind the newly created article might not belong to an existing section.
There is one form validation required. If the title is not set, you should not let the user save the article by disabling the "Save" button. To help the user, provide meaningful initial placeholder text in both input elements.
Labeling
I would like you to add the aria-label attribute to your text input and text area. The attribute is primarily used for accessibility, adding labels that screen readers can read. We will be using them for a secondary purpose -- providing labels that the tests can read.
On the <input>, add aria-label="title".
On the <textarea>, add aria-label="body".
Mode switching
The Home component (in index.js) will be responsible for switching between adding and viewing.
Create a new component called ButtonBar. It should display a single button called "Add".
The component will take a single callback prop called handleClick. When the button is clicked, the component should call the function, passing "add" as an argument (i.e., handleClick('add')).
Add this new component to Home underneath the Article component.
Write the handleClick callback so that when it receives the command "add", it switches the entire interface over to the Editor (we should not see IndexBar, Article, or ButtonBar).
In the Editor, if the user uses the "Cancel" button, the Editor should go away and IndexBar, Article, and ButtonBar restored. if the user had been viewing an article, it should still be visible.
If the user instead uses the "Save" button, IndexBar, Article, and ButtonBar should be restored, and the article the user just created should be displayed in Article.
Hint: this modal switching should sound like there is some new state involved
Updating the collection
Of course, the article should also be added to the main collection as well...
Recall that we don't mutate state, we make a copy.
Updating IndexBar
Of course, we would like IndexBar to be consistent with the current article (i.e., display the correct section). There are a couple of ways to ensure this. I would like you to share currentArticle with IndexBar as a new prop. Unfortunately, you can't just use the first character of the title to determine the section, because then we couldn't switch sections. Instead, I would like you to add an effect hook. We discussed useEffect in lecture, and you used (or will use) the effect hook in practical 3.
The basic concept is that we register a function to be called under certain circumstances (when state or prop values change). The useEffect() function takes two arguments, the first is the function to run and the second is the list of variables to watch. For the practical, we passed the empty array indicating that we just wanted to run the effect once when the component is first created. You will want to watch for changes to the current article, changing the section if appropriate. This will mean that the section will change when the article changes, but can then be changed independently.
It is possible for the user to create a new article with the same title as a current article. We will ignore that problem in this assignment as we will fix it in the next assignment when we introduce a server (which will validate that the title is unique).

Part 3: Allow editing
Once you can successfully add new articles, you will adapt the interface to allow editing of articles. Add an "Edit" button to the ButtonBar to request the current article be edited. When clicked, the edit button should call handleClick with the string "edit".
When handleClick receives "edit", the interface should then switch to your new Editor component, but the current title and article body should already be filled in. To do so, add an optional second prop to Editor called article. When creating a new article, this prop should not be set, or be set to undefined. When editing an article, this prop should be the article Object to be edited.
On "Save", the date should be updated and the changes saved (and the newly edited article displayed). On "Cancel", the changes should be discard leaving the article unmodified and the previous article view should be restored (displaying the original, unedited, article).
Exceeding expectations
Add a third button "Delete". It should delete the current article.
I would also like you to improve the user experience (UX) of the website.
One principle in UX design is to not allow the user to perform actions when the actions don't make sense. We have already done this in Editor, where the "Save" button isn't enabled unless the user has added a title. The user also shouldn't be able to edit or delete if there isn't a current article. Add another prop to ButtonBar called allowEdit. When True, the "Edit" and "Delete" buttons should be visible. When False, they shouldn't be visible.
Finishing up
To earn full points for code organization and style your submission should not have ESLint warnings or errors when run with npm run lint (or npx eslint .). Remember than you can fix many errors automatically with npm run lint -- --fix (although since ESLint can sometimes introduce errors during this process, we suggest committing your code before running "fix" so you can rollback any changes). As described in the README, the assignment skeleton includes the Prettier package and associated hooks to automatically reformat your code to a consistent standard when you commit. Thus do not be surprised if your code looks slightly different after a commit.
Submit your assignment by pushing your changes to the GitHub classroom via git push --all origin and then submitting your repository to Gradescope. You can submit (push to GitHub and submit to Gradescope) multiple times. Portions of your assignment will undergo automated assessment. Make sure to follow the specifications exactly, otherwise the tests will fail (even if your code generally works as intended). Use the provided test suite (run with npm test) to get immediate feedback on whether your code follows the specification (remember that the provided tests are not exhaustive, and an application that passes all of these tests is not guaranteed to be correct). Because of the increased complexity of a React application, Gradescope can take minutes to run all of the tests. Thus you will be more efficient testing locally and only submitting to Gradescope when you are confident your application meets the specification.
FAQ
Do I need to implement unit testing?
We will learn later in the semester how to unit test React components. For this assignment you are not expected to implement any of your own unit tests. The skeleton includes some unit tests to assist you in your development and to ensure that the grading scripts can automatically test your submission.
What if the tests and assignment specification appear to be in conflict?
Please post to Piazza so that we can resolve any conflict or confusion ASAP.