Due: 2014-01-13 10:30a
*I did not include this originally, but I would like at least one picture with each part of this assignment. *
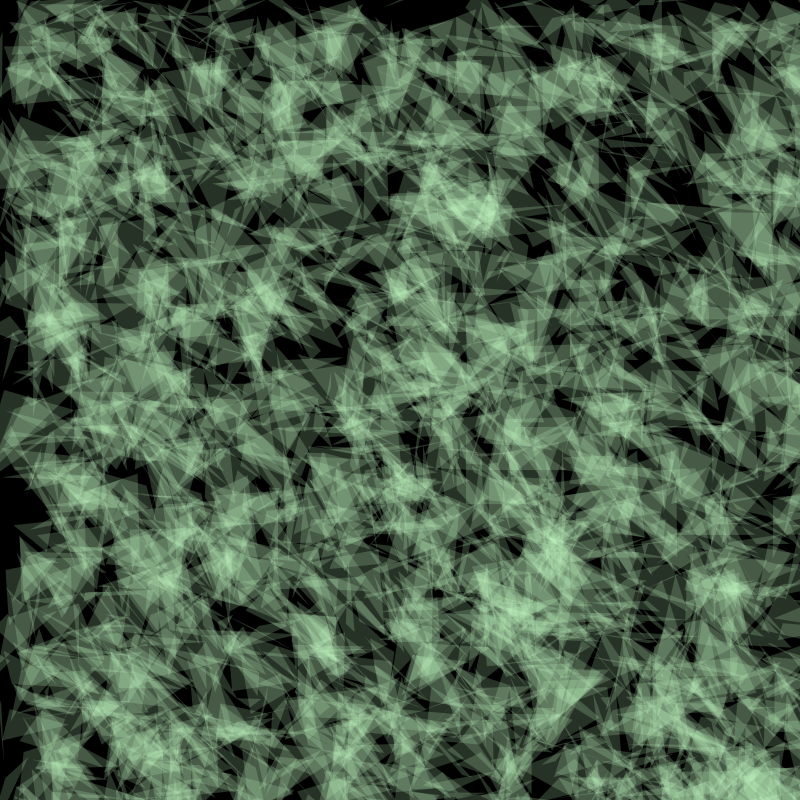
For the first part of this assignment, I want you to play a bit with randomness. You are going to create a “triangle flurry” – something that looks like this (after a while):
The principle is really simple. On every frame you draw one triangle. The triangle is randomly placed and randomly sized. We also give it a good amount of transparency so we get interesting interactions between the triangles.
You should start by generating two random numbers which will be the position of the first point of the triangles; we’ll call these x1 and y1. The x1 value should be some number between 0 and the width of the canvas, and the y1 value should be some number between 0 and the height of the canvas.
For the other two points, we could do the same thing, but this creates really large triangles. We want our triangles to be relatively small, so instead of randomly picking locations for them, we can randomly chose a distance away from the first point instead. Let’s say that we want our triangle to be less than 100 pixels on a side. We can set x2 to be x1 + random(200) - 100. We use this formulation so that x2 can be somewhere between -100 and 100 pixels away from x1. Do this for y2, x3, and y3. Now, you will have a smallish triangle with random sides placed in a random location. Feel free to experiment with the length of the sides until you get something you like.
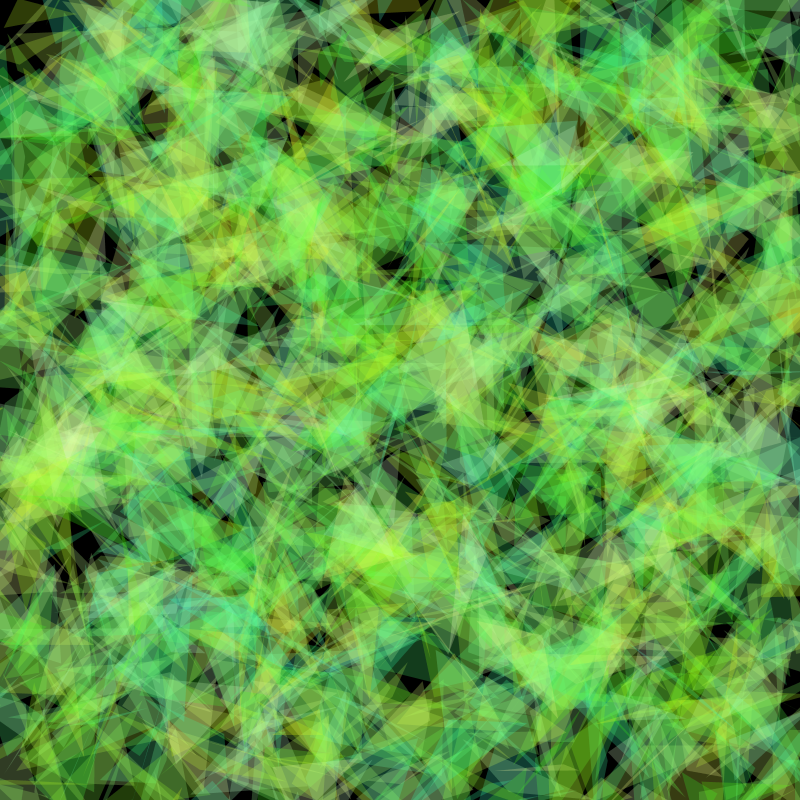
For color, I turned off the stroke (noStroke()), and I made the fill quite transparent. For the color, incorporate random in some way that you find interesting. You can go full random on all color channels, or you could try something more subtle by picking a basic color that you like and then using random to explore the nearby colors the way we picked the second and third points for the triangle.

I would like you to name the sketch using this pattern: username_hw4a.
Please use the code I gave you in assignment 2 to take at least one picture of some state of your sketch that you like. Name it using the pattern username_hw4a-####.png.
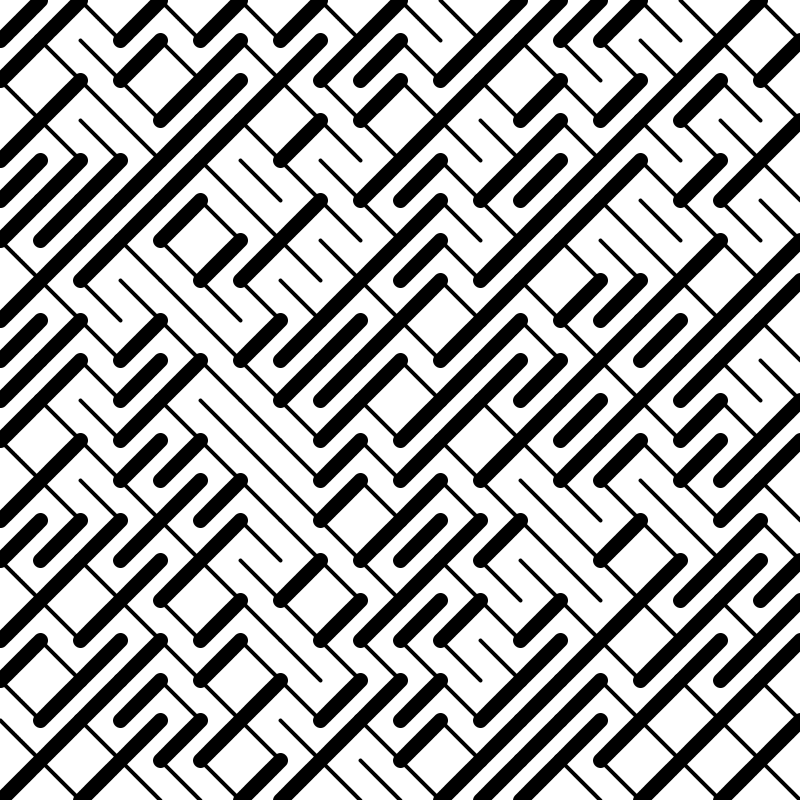
The first exercise is to produce a pseudo-maze. This is an image that looks like it might be a maze, but actually isn’t. Here is an example.
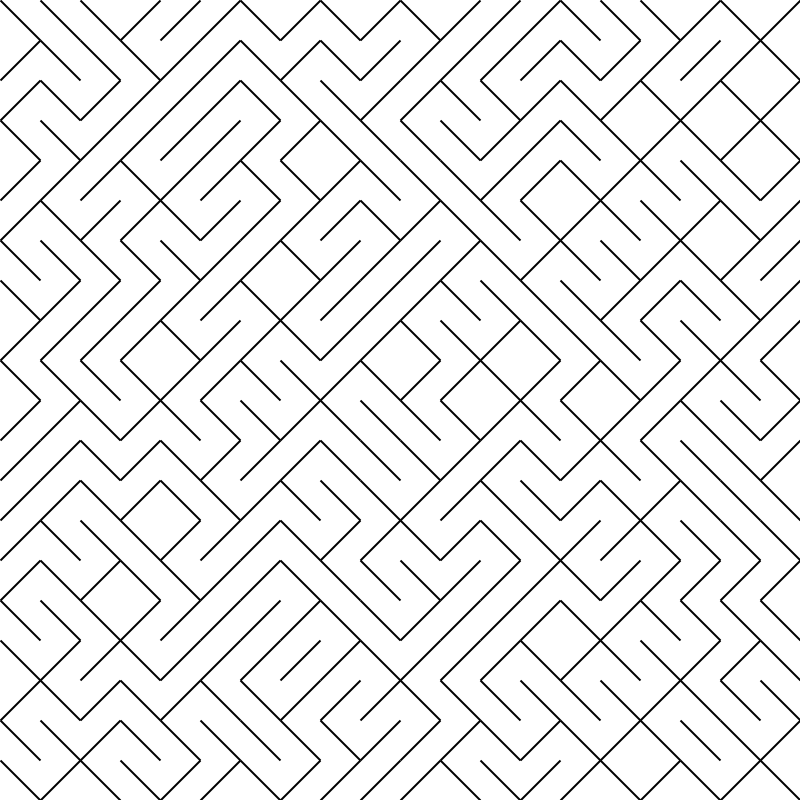
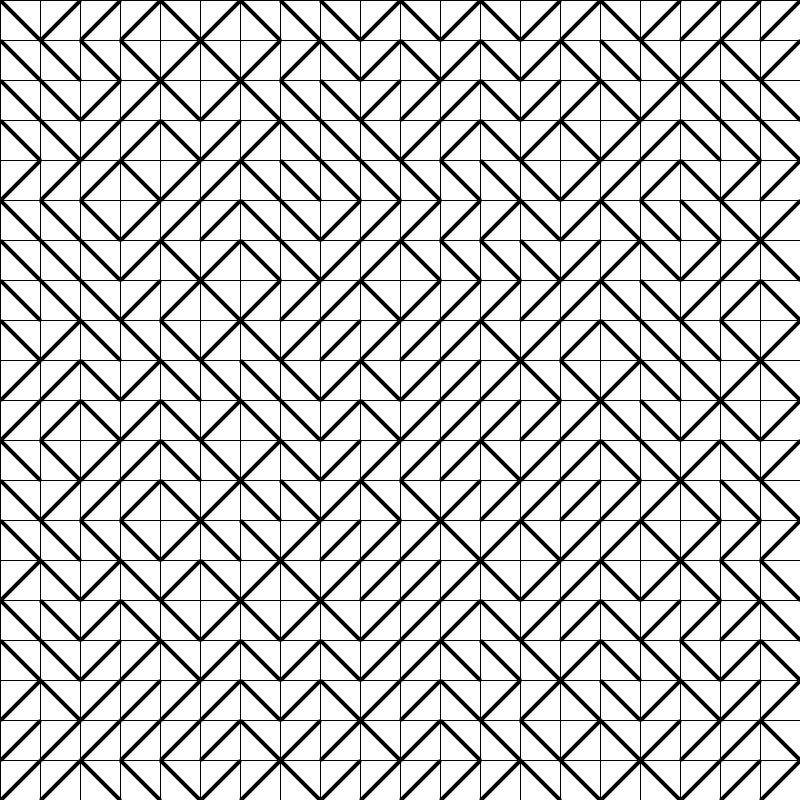
The technique for doing this is fairly simple. We consider the canvas to be a big grid of tiles. For each tile we flip a coin (otherwise known as random()). If the coin comes up heads, we draw a diagonal line from the upper left to the lower right of the tile. If it comes down tails, we draw a line from the upper right to the lower left. Here is another iteration, this time with a grid overlaid on top of it so you can see the individual tiles.
To get you started, here is some starter code:
int tileCount = 20;
/*
Initialize the canvas.

The noLoop() function means that draw() is only called once. To call it again, you need to call the function redraw().
*/
void setup() {
  size(800, 800);
  noLoop();
}


void draw() {
  background(255);

}

/*
This handles keyboard events. When the user types 'r', the screen will refresh. When the user types 's', the current frame will be saved.
*/
void keyReleased() {

  switch(key) {
  case 'r':
    redraw();
    break;

  case 's':
    saveFrame("username_hw4a_####.png");
    break;

  }
}
This code does three things. First, it gives you a variable tileCount, which determines how many tiles we want across and down. Second, it turns off the frame loop. The noLoop() function means that draw will only run a single time and then stop. We can force it to run again by calling the redraw() function. Finally, this adds a key handler so you can save images and force the canvas to redraw (make sure to change the username part).
Start by writing code to do just the first row. This will be a simple for loop that iterates tileCount times. For each iteration of the loop, draw a line from the upper left corner of the tile you are on to the lower right corner. Since tileCount gives us the number of tiles across and down, the dimensions of the tile will be a function of tileCount, width and height. If you do that, you should get this (I’ve cropped the canvas a little):

Now it is time to flip a coin. If you call (int)random(0,2), you will get a number that is either 0 or 1 (we put the (int) at the front because random will give us a floating point number and we just want integers – this forces the number to be an int). Now write a if statement. If the number is 0, draw the line like you did above. If the number is a 1, draw the other diagonal. Here is what it should look like now:

You are ready to tile the whole canvas now. Put your whole for loop inside of a second for loop that loops for another tileCount iterations. You will need a second control variable for this one, of course. Use this to change the y coordinates of your lines. You should now have a pseudo-maze. Inside of your if statements, right before you draw the line, add a line that changes the stroke weight. Make one diagonal dependent on mouseX and the other dependent on mouseY. Using the raw mouse coordinates will make the lines too thick, so I divided them by 20 for the actual weights. Here is an example of how this might appear (remember that you need to type ‘r’ to refresh the canvas):
Once you have this working, we can make it more interesting by making the stroke weights different based on the direction of the diagonal.
Add at least one more thing to your sketch. Color would be good. You might color the diagonals differently. You could make some good use of transparency. You might see what happens when you let the canvas draw on old layers. You could try changing the end cap style (look in the Processing reference). If you really want a challenge, come up with a different collection of tile styles that you randomly chose (elbows, for example).
I would like you to name the sketch using this pattern: username_hw4b.
Please use the code I gave you in assignment 2 to take at least one picture of some state of your sketch that you like. Name it using the pattern username_hw4b-####.png.
This exercise is going to make use of the grid again. In each cell of the grid, we will draw a single short line of a fixed length. This short line will have one end in the center of the cell. The other end will point in the direction of the mouse. In the example below, the mouse is in the upper left.

In order to do this, we need to break out the trig again. This time, we are going to make use of similar triangles. Consider a line going from our origin to the current mouse position. The endpoint of our line will fall somewhere on that (presumably) longer line. We can then make two right triangles with the origin at point (x1,y1), the start point of our line. Now, the big deal about similar triangles is that the ratio of the parts is the same. So, the ratio of the distance to the mouse position with the length of our line is the same as the ratio of the difference between mouseY - y1 and y2 - y1. In other words, if we call the distance distance and the length of the line length, distance/ length = (mouseY - y1)/ (y2 - y1). Thus, if we know the distance, we can solve for y2 ( y2 = (mouseY - y1)(length/distance) + y1). We can do the same for x2. [If you can’t follow the math, don’t worry - you can just use these equations].
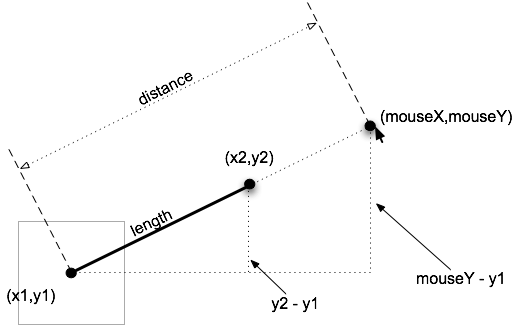
Of course, we need to know what distance is. If you remember your Pythagorean Theorem, you will recall that the length of the hypotenuse is the square root of the squares of the other two sides. In Processing, we have a square root function (sqrt()), and a square function(sq()). This will give you all the pieces you need to get these lines following the mouse.
Of course, I want you to play around with this one as well. What the above really gives you is the direction of the mouse and the distance it is from this point. Try using these for interesting effects. You could change the length or the weight or the transparency of the line based on the distance to the mouse. You don’t even need to keep the line. You could make triangles that spin to point at the mouse and change size with the distance. You could make a grid of eyeballs that track the mouse. The further you go outside the box the better, just think of creative ways to make use of that direction and distance information.
I would like you to name the sketch using this pattern: username_hw4c.
Please use the code I gave you in assignment 2 to take at least one picture of some state of your sketch that you like. Name it using the pattern username_hw4c-####.png.
For both sketches, you should include the documentation block below at the top of your sketch. Make sure that you specify what you did that was cool and interesting.
/**
Assignment Four

A description of the sketch.

Your name
The date
**/
I would like this code turned in in the DROPBOX on MiddFiles. You can refer to the reference on the LIS wiki to help you connect to the file server.